![]()
CHAPTER SEVEN
Personal Homepage
I am sure that your
curiosity levels have risen. I am sure that every inquisitive bone in your body
is asking just one question. Even the 0.11111 millimeter short bone in your
left toe wants the answer to only one question. How the heck can I make my own
site? How the heck can I have my own homepage for others to see, for others to
visit? So go ahead and tell me if I am wrong?! Infact I’m even sure that I am
more than a ninety-nine percent bingo. So read on further to uncover what lies
beneath the making of a homepage.
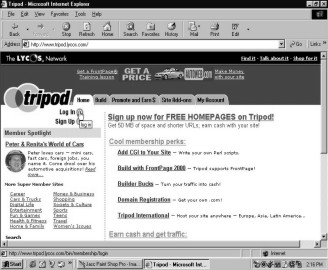
Homepage is your personal page on the Internet. It is not used commercially. To create your own homepage you need to sign up with one of the websites that offer you free space. If you use the space provided by them, then you are not required to shell out any green to put up your page on the net. Sounds good, doesn’t it? Well, log on to one such site by typing in www.tripod.com and signing up for the free homepage space.
|
|
|
|
Screen 7. 1 |
Screen 7. 2 |
|
|
|
|
Screen 7. 3 |
Screen 7. 4 |

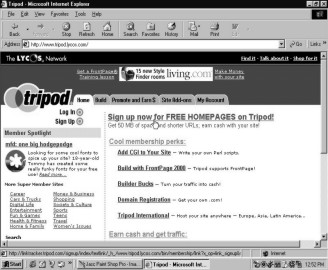
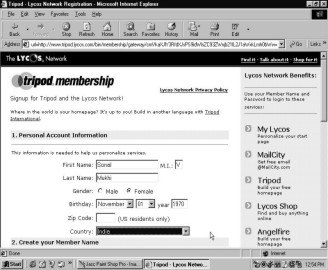
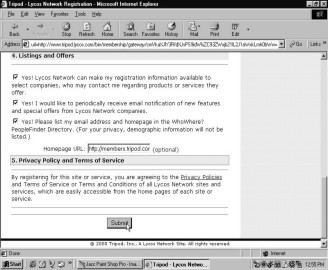
Fill out the registration form provided by the Tripod site. Tick their optional offers which include registering your email and homepage address in their directory, informing you about their latest features and forwarding your registration form to interested companies.
|
|
|
|
Screen 7. 5 |
Screen 7. 6 |
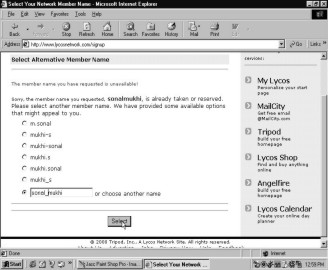
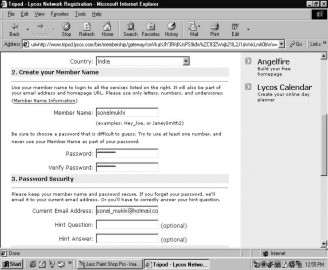
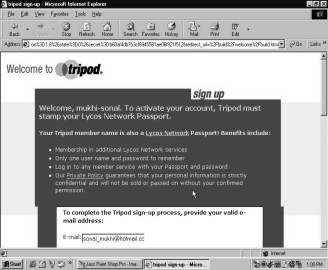
Incase the member name you had asked for is already grabbed by somebody else, select another one from their assorted basket or create your own. Once the new member name is accepted by Tripod, you need to enter your functional email identity to complete the signing in process.
|
|
|
|
Screen 7. 7 |
Screen 7. 8 |
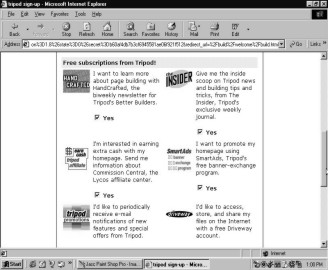
Tripod offers you a host of free subscriptions that you can receive by email. Tick the adjoining checkboxes to receive those subscriptions that please you.
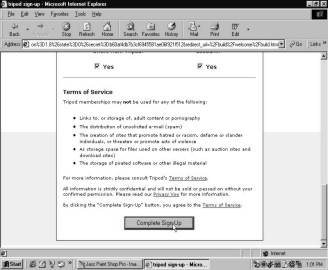
Accept the terms of service solicited by Tripod and hit on the `Complete Sign-Up` button.
|
|
|
|
Screen 7. 9 |
Screen 7. 10 |
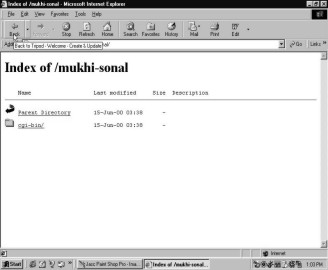
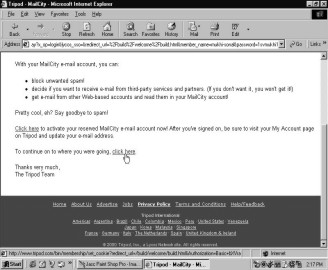
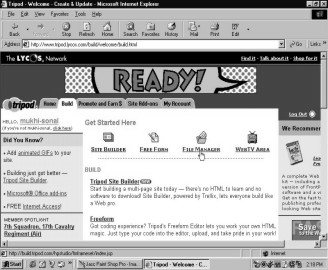
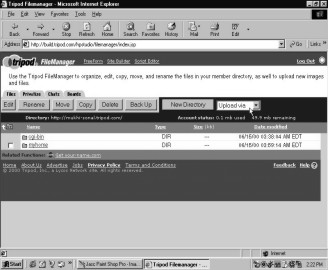
Tripod welcomes you to its site building page with a warm hello. Click on your log-in name to view your index files. This will list out the size and description of your files. It will also indicate when these files were last modified. To return to the Tripod site building page, click on the `Back` button.
|
|
|
|
Screen 7. 11 |
Screen 7. 12 |

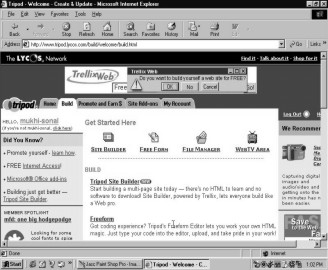
To build your own homepage, click on the `Tripod Site Builder` link.
|
|
|
|
Screen 7. 13 |
Screen 7. 14 |

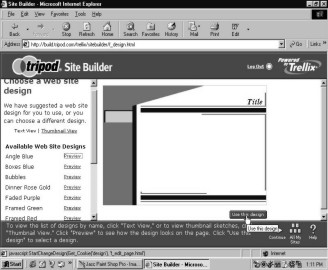
To select a template for your homepage, click the first option. A template is the background of your page. You can also take the option of building a quick site by selecting the `Try Tripod Site Builder Today`.
|
|
|
|
Screen 7. 15 |
Screen 7. 16 |
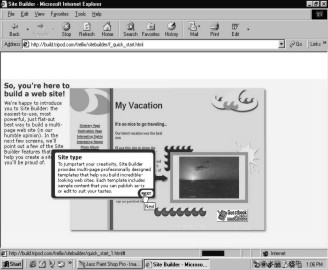
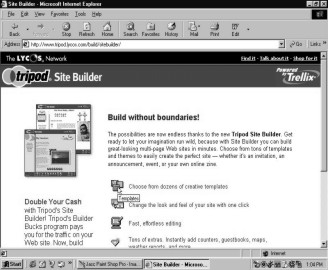
You are welcomed with an introduction to the Tripod Site Builder. This package offers you a range of attractively designed templates to choose from. You have the liberty to edit their custom made templates or accept them in their original form. Click on the `Next` button to be taken to the subsequent page.
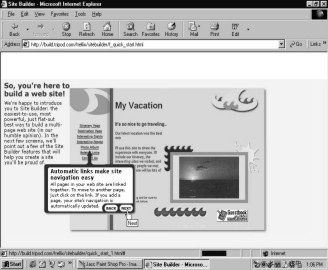
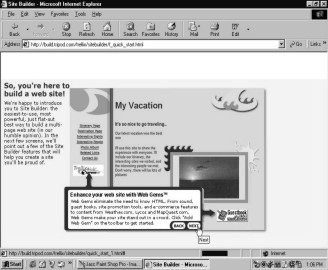
The site builder offers you nuggets of advice as you move from one page to the other. Make a note of these free pieces of advice as they will help you build a creative and updated site.
|
|
|
|
Screen 7. 17 |
Screen 7. 18 |
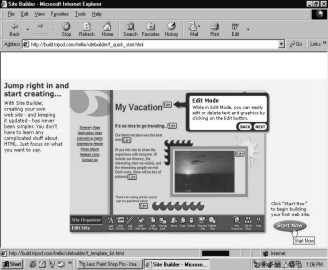
Hit the `Start Now` button to commence the site building procedure. Doesn’t this remind you of the three little pigs who went about building their little straw, hay and cement house? Just make sure the big bad wolf can’t blow over your beautiful site by letting out a puff of wind!
|
|
|
|
Screen 7. 19 |
Screen 7. 20 |
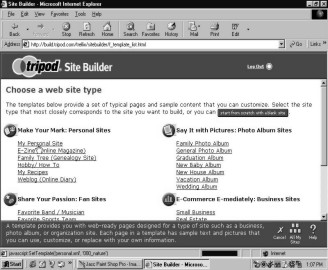
You have a cornucopia of site types to choose from. Select any of the site types that catches your fancy. Let us make a personal site. Click on `My Personal Site` under Personal Sites.
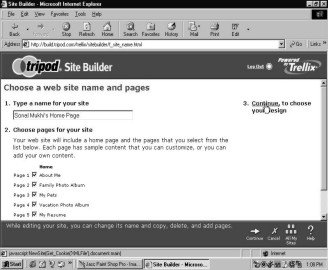
Give your site a name. You can name it 'Charlie and Chaplin’s Personal Site' or 'All about my Pink Pancreas' or then 'My Tongue and I'. To include different content in your site, tick the options mentioned under Home. You are free to add your own content, especially since the Tripod menu does not include options on the description of the digestive system nor does it house a thesis on the dangers of starch and sugar.
|
|
|
|
Screen 7. 21 |
Screen 7. 22 |
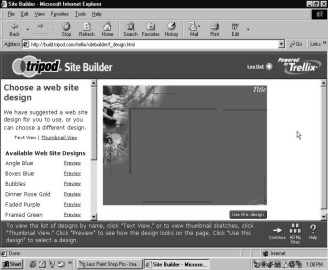
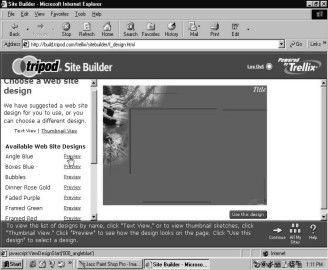
Tripod presents you with a host of template samples. You can choose right from the colour of the background to the design on your page, from the style of the font to the borders across your site. To take a quick glance at the templates, click on the `Preview` button. Once the template design has matched what you have in mind, click on the `Use this design` button.
|
|
|
|
Screen 7. 23 |
Screen 7. 24 |
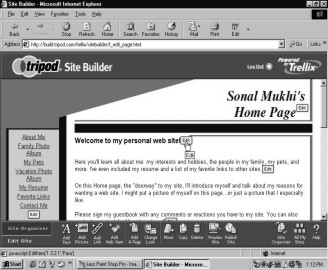
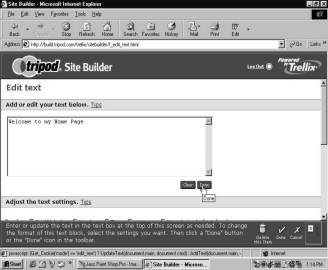
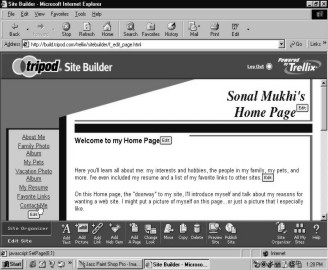
Automatically the design that you have selected will be moulded into your site format with your site name towering above the page. The small boxes containing the word `Edit` allow you to make changes in the page. If the font ain’t your style or the colour of the page don’t match your mood, simply hit on these buttons. To change the words 'Welcome to my personal web site!', click on the `Edit` button. You will be taken to a blank box where you can alter the subtitle of your site. Once you have made the required changes, click on the `Done` button.
|
|
|
|
Screen 7. 25 |
Screen 7. 26 |
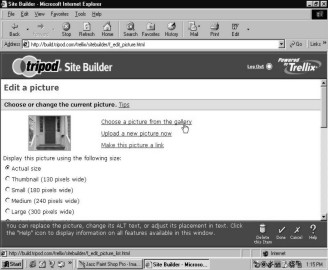
To change a picture on your site, click on the `Edit` switch and choose another picture from the photo gallery.
|
|
|
|
Screen 7. 27 |
Screen 7. 28 |
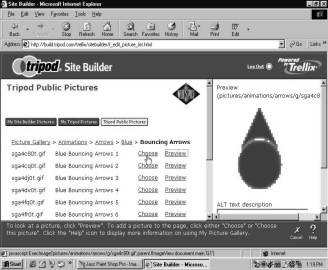
Select the category under which you would like to view the pictures. Click on `View Category` and then choose the picture you want. To see the picture, click on the `Preview` button.
|
|
|
||
|
Screen 7. 29 |
Screen 7. 30 |
||
|
|
|
|
||
|
Screen 7. 31 |
Screen 7. 32 |
|
||

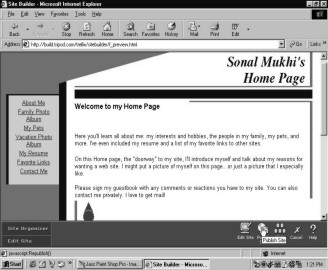
To have a sneak preview of your site, click on the icon at the bottom of your page that says `Preview Site`.
Your whole work of art will loom up before you. Take a careful look at your site content and style. If you are pleased with what you see, click on the icon which allows you to send your site for publishing. Publishing the site means that it will be put up on the Internet for the whole world to see!!
|
|
|
|
Screen 7. 33 |
Screen 7. 34 |
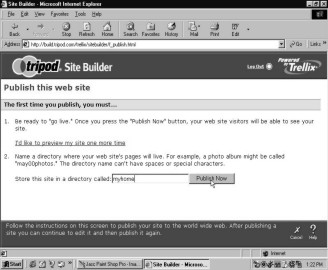
Tripod now gives you the green signal to put your newly created site online. Your site will now be a live piece of art that will be admired by many a passer-surfer who enters the net gallery. Name the directory in which your live and kicking baby will peacefully gurgle as people come and rock his cradle. Let’s call it 'myhome', so that the baby is completely at ease and feels right at home.
|
|
|
|
Screen 7. 35 |
Screen 7. 36 |

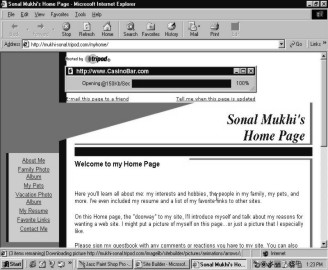
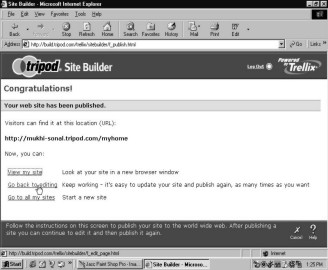
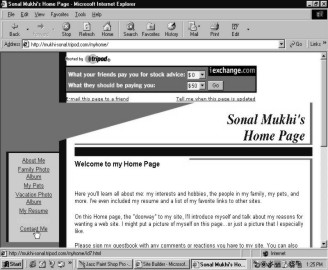
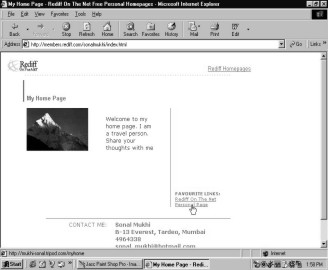
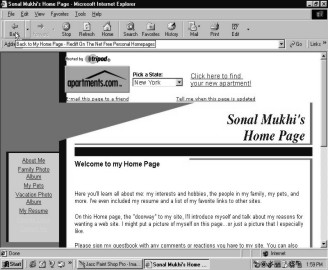
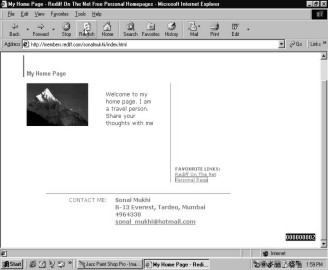
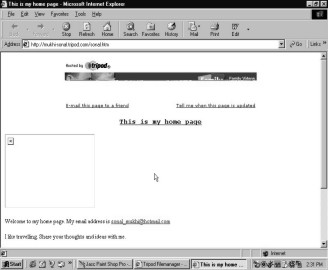
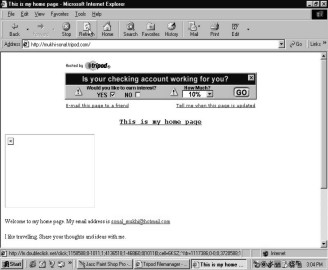
Congratulations!! You have successfully managed to put your site on the Internet. You will get the site address in the form of a URL, which stands for Uniformed Resource Locator. The URL of your site is http:// mukhi-sonal.tripod.com/myhome. This URL is displayed in your address bar.
The reason for such a long site address as compared to a short and sweet www. yahoo.com is simple. As you have used the free space provided by Tripod, you are obliged to include their name within your URL. The name of your directory will also form part of your URL.
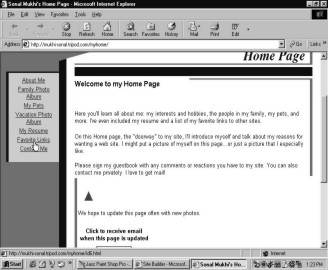
The left hand margin on your homepage contains the titles of the various other pages available on your site. To visit any one of them, click on the name. Let us click on `Favourite Links`.
|
|
|
|
Screen 7. 37 |
Screen 7. 38 |
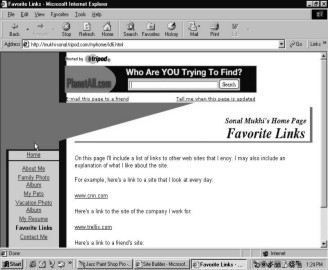
You will be taken to a fresh page that contains links of your favourite sites, the ones you visit without fail at least seventeen times during a day. You can also include an explanation that throws light on your obsession for these particular sites. Your affinity for the site on green shelled turtles could be because your girlfriend works at the local acquarium or then the warm spot you sport for the site on dentistry could be to please your next door neighbour who was the Close-Up role model . And hey, don’t forget to include the site on flowers and bees in your list of favorites. Why not let the whole world know that your Botany professor holds you at gun point if you are not aware of the hourly changes that take place in the chlorophyll and corollas?!
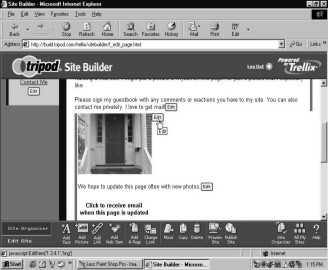
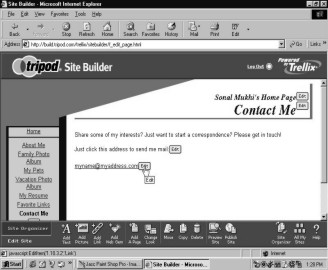
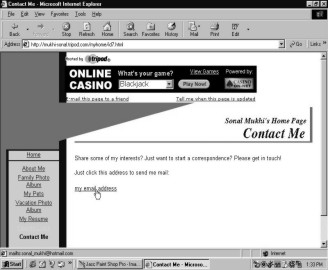
To create a contact address where people can drop off messages for you click on the `Contact Me` button.
|
|
|
|
Screen 7. 39 |
Screen 7. 40 |

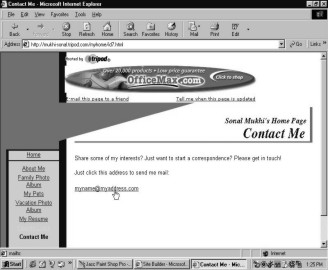
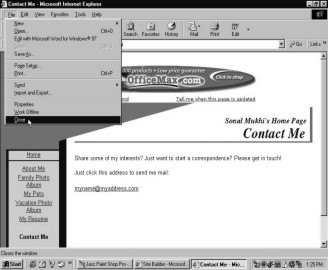
This allows you to leave your email address on the site so that people who visit your homepage can communicate their opinions to you. Close this page and go back to editing your site.
|
|
|
|
Screen 7. 41 |
Screen 7. 42 |
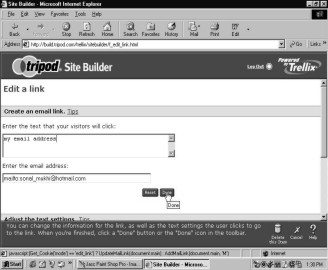
Once again click on `Contact Me` and the format of an email address will be displayed on this page.
|
|
|
|
Screen 7. 43 |
Screen 7. 44 |
Enter your message in the first blank box. In the second blank box, enter your email address. Your email address will always have the prefix 'mailto' attached to it. Once you have entered all the required data, press the `Done` switch. Once again hit the `Publish Site` icon to upload the changes you have made.
|
|
|
|
Screen 7. 45 |
Screen 7. 46 |
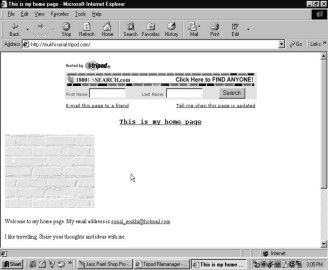
To return to your site, type in the URL in the address bar. You will be taken to your recently updated site.
|
|
|
|
Screen 7. 47 |
Screen 7. 48 |
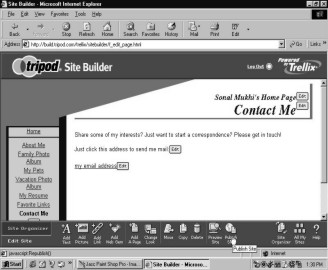
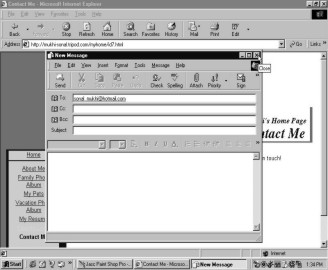
To confirm that your email address functions on your site, click on `Contact Me`. Once you are taken to the communication page, click on `my email address`. Instantly a Microsft Outlook Express dialog box will open. A Compose message box will appear before you that already has your email address stored on it in the `To` address bar. Now you can be sure that anybody trying to contact you through the site can successfully do so!! So now, return to your homepage and put your feet up on the desk to await feedback mail about your new site!!
|
|
|
|
Screen 7. 49 |
Screen 7. 50 |
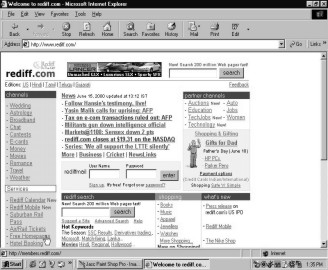
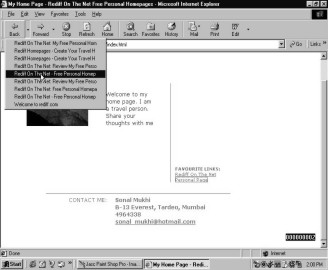
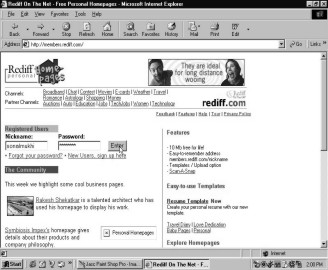
To create your own website on an Indian site offering free web space, take a trip to www.rediff.com. Click on the `Free Homepages` services.
|
|
|
|
Screen 7. 51 |
Screen 7. 52 |

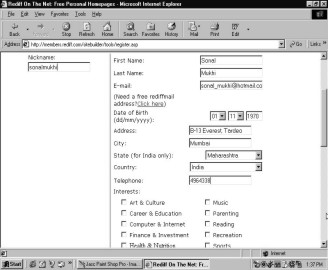
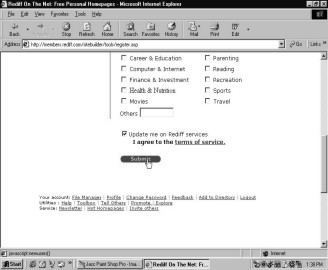
Since you are a new user, you need to sign up with Rediff. As always, fill up their form supplying all the essential details about yourself and hit the `Submit` switch.
|
|
|
|
Screen 7. 53 |
Screen 7. 54 |
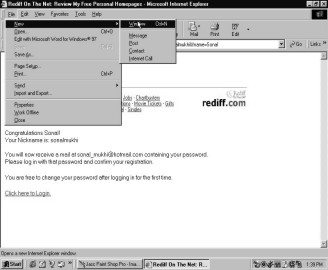
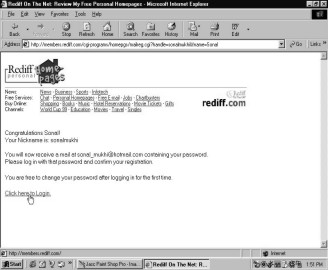
You will receive a message that congratulates you on being accepted to create a site on Rediff.com. But first you need to await a mail from Rediff that will confirm your registration and supply you with the required password to continue on their site.
|
|
|
|
Screen 7. 55 |
Screen 7. 56 |

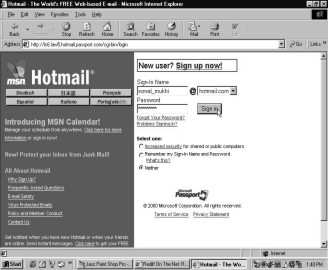
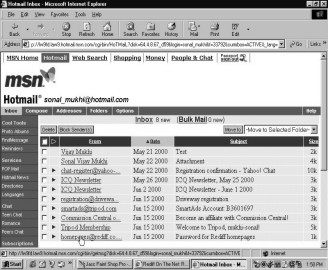
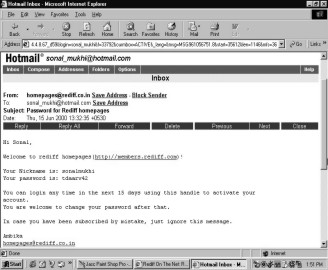
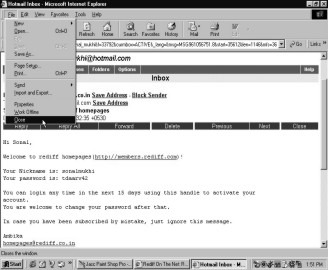
Immediately open another window and visit your Hotmail inbox. And there awaits you the mail from Rediff.com. Talk about quick delivery!! I’m sure that the guys at Rediff could beat the pizza delivery boys hollow when it comes to speed delivery!! Access the Rediff mail and note down your password. Close this window and return to the Rediff homepage window.
|
|
|
||
|
Screen 7. 57 |
Screen 7. 58 |
||
|
|
|
|
||
|
Screen 7. 59 |
Screen 7. 60 |
|
||
|
|
|
|
||
|
Screen 7. 61 |
Screen 7. 62 |
|
||
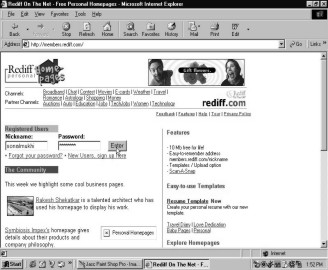
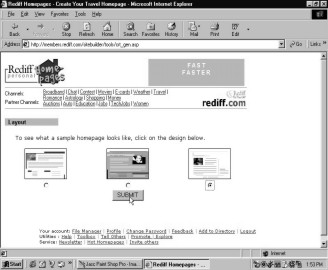
To be able to continue at Rediff, provide your log-in name and password.
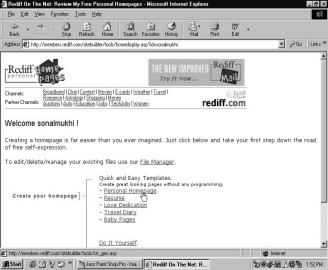
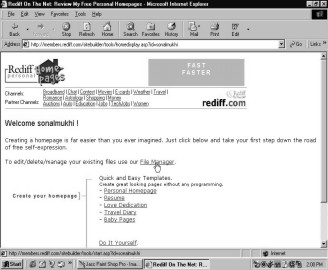
To create your very own homepage, click on the `Personal Homepages` option.
|
|
|
|
Screen 7. 63 |
Screen 7. 64 |
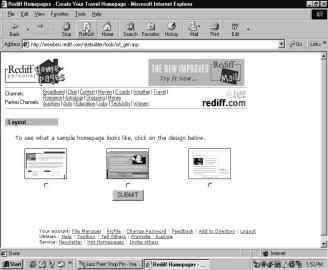
You have a choice of three layouts. Do 'ena mina mynah moo' and select the template for your site.
|
|
|
|
Screen 7. 65 |
Screen 7. 66 |

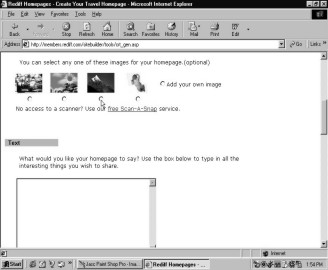
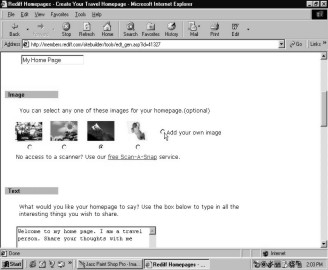
Title your homepage in the space provided. Be whacky, wild, conservative or then plain boring when you decide the name of your homepage.
You can select an image for your site from the array of pictures that Rediff has to offer. You also have the freedom to add your own image. If you want the picture of your boyfriend, down on bended knees, as the image to greet those who visit your site, then go ahead and pin him down!! Incase you can’t get him to do that, I guess a snapshot of your pet poodle balancing himself on his hind limbs would do just fine, wouldn’t it?!
|
|
|
|
Screen 7. 67 |
Screen 7. 68 |
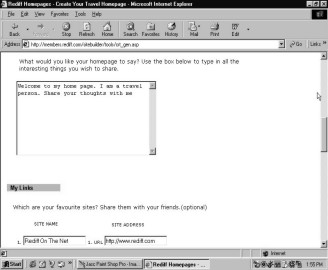
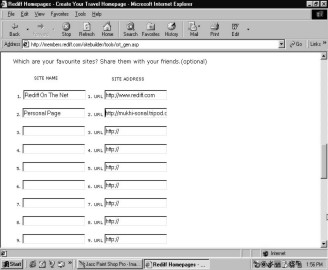
You can add text to your homepage by simply entering it in the box provided. If you want to supply links to your favourite sites from your homepage, then enter them in the blank spaces provided.
|
|
|
|
Screen 7. 69 |
Screen 7. 70 |
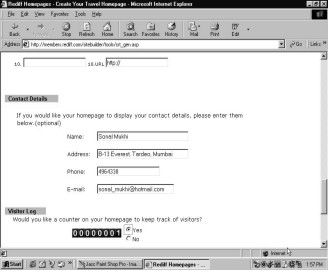
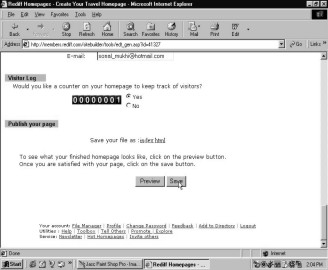
Further, if you wish to be accessable to the surfers who make a trip to your site, then enter your address, phone number and email identity. It is always good to know the number of visitors dropping into your site. Rediff allows you to keep a count of the visitors by providing you with that option.
Don’t forget to give a name to the file you want to save your homepage as. Click on the `Preview` button to get a glimpse of your site before it goes online.
|
|
|
|
Screen 7. 71 |
Screen 7. 72 |

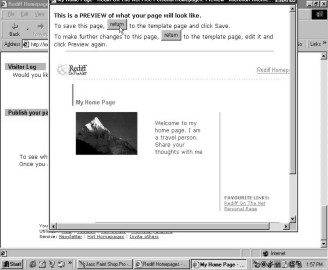
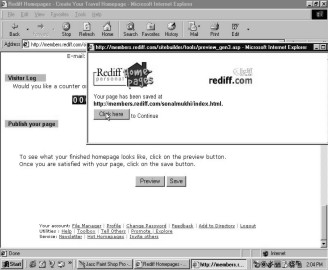
Your homepage as designed by you will appear on your screen. If it puts a wide smile on your face, then return to the template and save these changes. Incase you catch yourself frowning at the image or the font, return to the template page and edit the site accordingly.
|
|
|
|
Screen 7. 73 |
Screen 7. 74 |

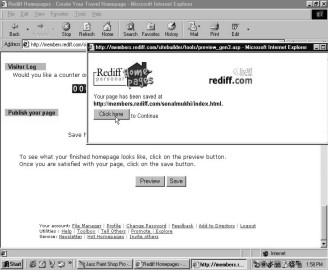
You will be greeted with the URL of your homepage. Once again you have to include the Rediff.com address within your URL as a token of gratitude to them for furnishing you with the free web space. To visit your site, click on the URL.
|
|
|
|
Screen 7. 75 |
Screen 7. 76 |
To attach your favourite links to your site, click on `Favourite links`. To allow visitors to visit your homepage created on Tripod, add it as a link on your Rediff site. A mere click on this button will take you to your Tripod homepage. To return to your Rediff homepage, click on the `Back` button.
|
|
|
|
Screen 7. 77 |
Screen 7. 78 |
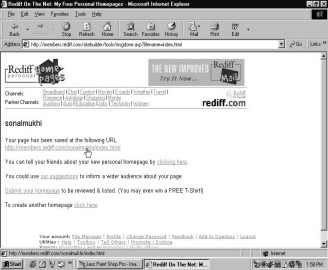
Note that Rediff is keeping a count of the number of visitors browsing through your site. You are the numero uno to visit your site! If you hit the `Refresh` button, then the recent changes made on your site will be uploaded. Take a look at the visitor count bar at the bottom right of the page. It has now changed to number 2.
To return to the Rediff website, simply click on the dropdown arrow next to the Back button. Select that page and once again enter your name and password to log on to your site.
|
|
|
|
Screen 7. 79 |
Screen 7. 80 |
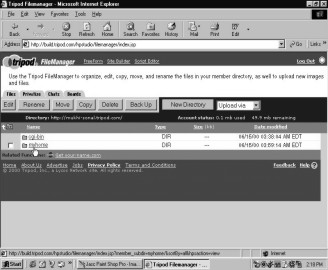
Like you have a chartered accountant to manage your accounts and tax payments (that is if you belong to the miniscule honest population of India that bothers to file returns), you aslo have a file manager at Rediff who takes care of your existing files. To pay him a courtesy visit, click on `File Manager`.
|
|
|
|
Screen 7. 81 |
Screen 7. 82 |
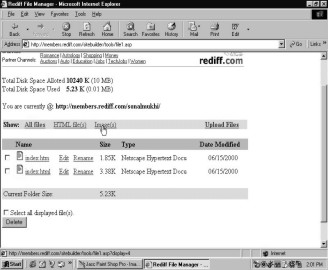
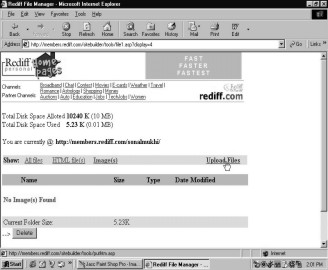
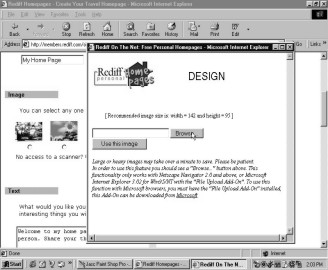
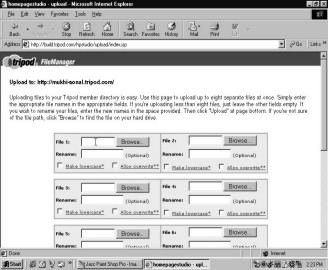
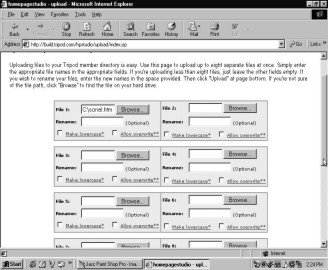
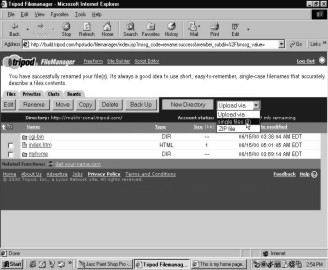
You have a summary of all your files stored in the file manager cabin. It gives you their file names, size and types. It also keeps a record of when the files were last modified. To upload an image file, click on `Image(s)` and hit the `Upload Files` button next to it.
|
|
|
|
Screen 7. 83 |
Screen 7. 84 |
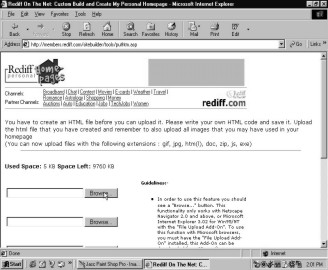
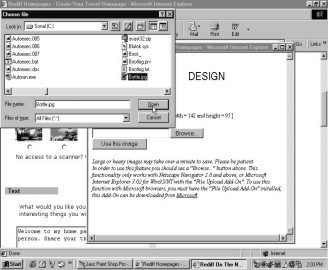
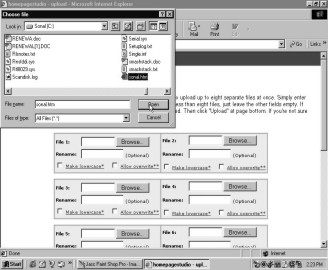
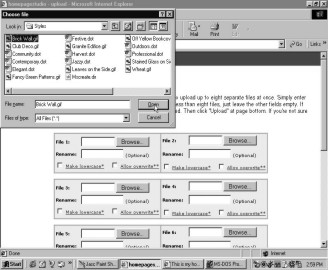
To add an image to your site, browse through the ones you have tucked away in your `C` drive. Click on the `Browse` button and from your `C` drive select an image. Next, click on the `Open` button.
|
|
|
|
Screen 7. 85 |
Screen 7. 86 |

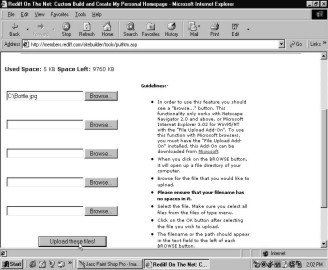
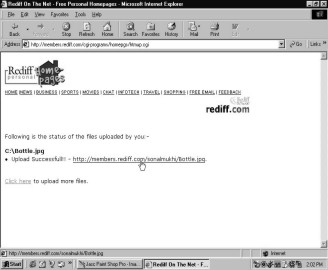
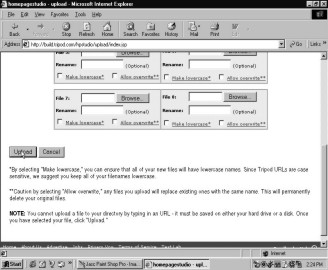
Once you are sure that you want to see this image on your site, click on the `Upload these files!` button. You can select more than one image if you so desire.
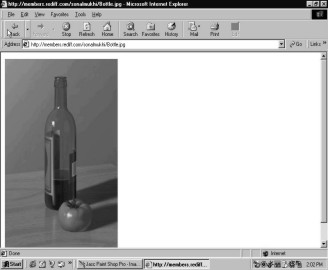
Rediff congratulates you once the upload has been successfully executed. To take a look at the picture, click on the URL following the successful upload message. And voila, the image of your beautiful green bottle complimenting the shiny red apple appears before you. Incase you are planning to start an e-commerce page on your site to sell apple ceder, then this picture would do just fine. Or else if you want to remind the children who visit your site that an apple a day keeps the doctor away, then pin this picture on your site for sure!
|
|
|
|
Screen 7. 87 |
Screen 7. 88 |
Return to your file manager and to modify the existing files, click on `Edit`.
|
|
|
|
Screen 7. 89 |
Screen 7. 90 |

If you want to warn the kids about the dangers of drinking, then you better add the bottle picture to your site. Select the option that allows you to add an image of your own choice.
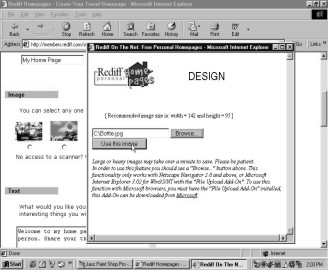
Follow the same procedure by clicking on `Browse` and selecting the bottle.jpg file. Click on the `Use this image` switch. Press the `Save` button to upload this on your site. The image is now displayed on your homepage.
|
|
|
||
|
Screen 7. 91 |
Screen 7. 92 |
||
|
|
|
|
||
|
Screen 7. 93 |
Screen 7. 94 |
|
||
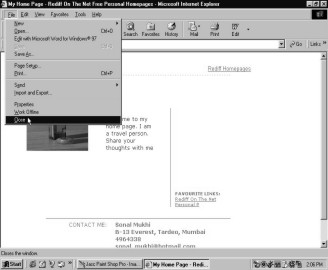
To continue at your Rediff site, click on the `Click here` button. You will be transported to your homepage, where the bottle and the apple welcome you with a smile. Notice how the count of visitors has changed to 3. Go to the File menu and close this file.
|
|
|
||
|
Screen 7. 95 |
Screen 7. 96 |
||
|
|
|
|
||
|
Screen 7. 97 |
Screen 7. 98 |
|
||


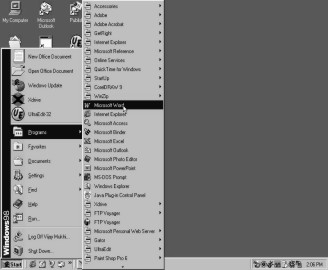
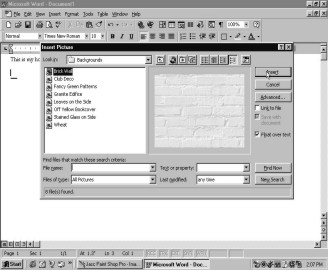
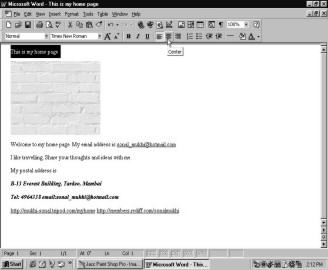
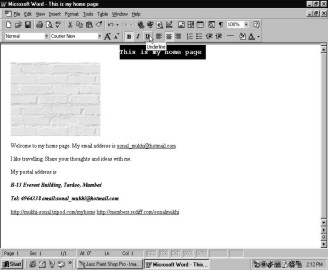
You can also make your homepage on Microsoft Word and then upload it on the Internet. This allows you to work offline during the time you are constructing your site. From the Programs menu, select `Microsoft Word`. Type your text in the blank file. To add an image to your site, click on Insert-Image-Picture and then select a wall paper from `Backgrounds`.
|
|
|
|
Screen 7. 99 |
Screen 7. 100 |
|
|
|
|
Screen 7. 101 |
Screen 7. 102 |

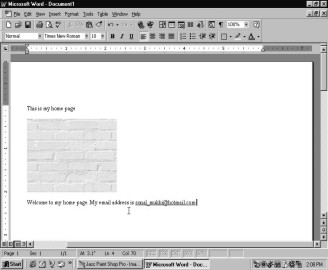
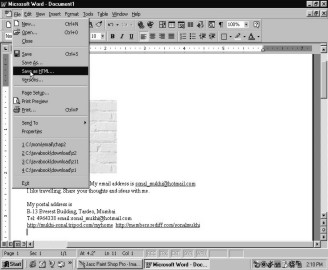
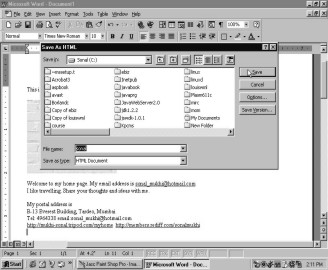
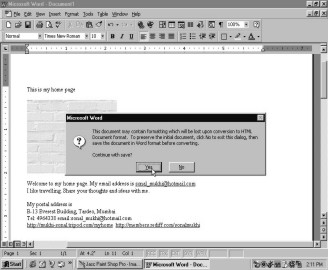
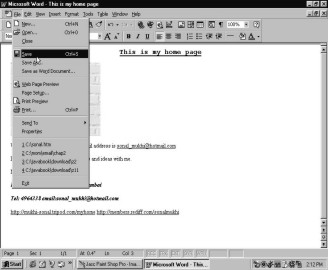
You can very well navigate on your harddisk and select the image which is more appropriate.Your text appears along with the brick wall image. Continue typing in what you would like to see on your site. Narrate your sweet love story (the one you share with your current boyfriend. The ex-love escapades can be filed away in the archives section of your site) or the episode when you actually awoke at 5.00 am one morning to see how handsome your milkman was. Only to realize that he was a she! Or then write about the time you decided to surprise your mom by baking her a three layered chocolate, pineapple and cheese cake. Well she was surprised all right, when your work of gourmet cuisine came crashing down on her head as she entered the kitchen!! Let the content on your site be so interesting that the visitors, instead of making a brief stop over at your site, decide to make it their surfing and sunbathing spot. Once you have added enough giggles, hahas and heehees to spice up your site, don’t forget to also key in your contact address, email identity and the URL of your other two homepages on Tripod and Rediff. Now, from the File menu select the option `Save as HTML`. Store this safely in the drive you will 'see' first. Word gives you a warning message that some formatting of your document may be lost on conversion to HTML. Acknowledge this sign of caution and continue to save the document.
|
|
|
||
|
Screen 7. 103 |
Screen 7. 104 |
||
|
|
|
|
||
|
Screen 7. 105 |
Screen 7. 106 |
|
||
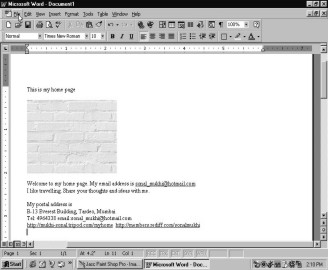
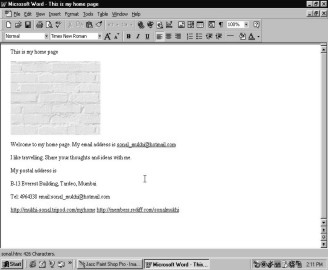
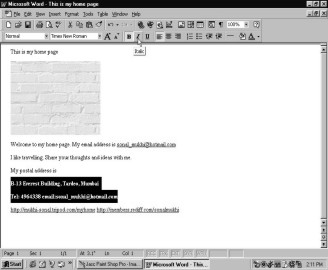
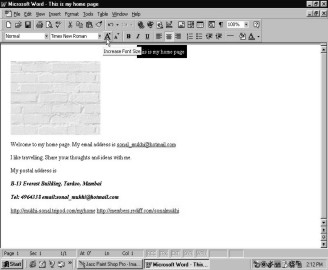
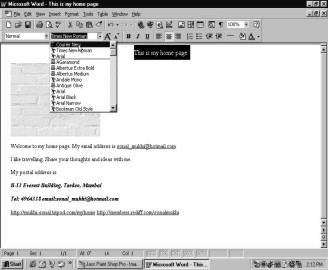
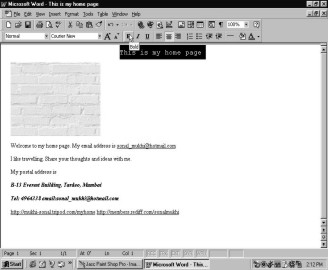
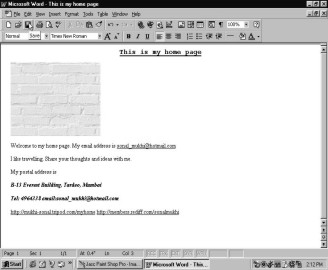
The advantage of working in Word is that you can make changes on your site as easily as you would make for any simple Word document. Want to highlight your encounter with the purple grasshoppers from planet Mars? Simply select that text and click the Big `B` button on your Toolbar. And like how every little, petite and positively minuscule thing related to the Big B is blown out of proportion to a one crore digit figure, this part of your text too will become big and bold. If you want to give this text an italic look, then click on the `I` button. To centralize the text, hit the `Center` button. To increase or change the font style, select the point size and the letter curves that suit your style from the respective dropdowns. You may also underline the text by clicking on the `U` button. Make sure that once all the changes are made, you remember to save them.
|
|
|
||
|
Screen 7. 107 |
Screen 7. 108 |
||
|
|
|
|
||
|
Screen 7. 109 |
Screen 7. 110 |
|
||
|
|
|
|
||
|
Screen 7. 111 |
Screen 7. 112 |
|
||
|
|
|
|
||
|
Screen 7. 113 |
Screen 7. 114 |
|
||
|
|
|
|
||
|
Screen 7. 115 |
Screen 7. 116 |
|
||

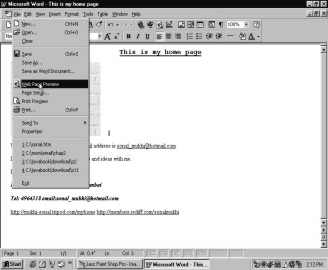
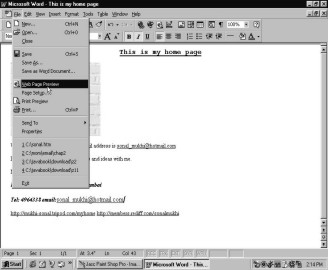
A click on the option `Web Page Preview` from the File menu will allow you to see your beaux-art. After a careful look at your master piece, close the file.
|
|
|
||
|
Screen 7. 117 |
Screen 7. 118 |
||
|
|
|
|
||
|
Screen 7. 119 |
Screen 7. 120 |
|
||

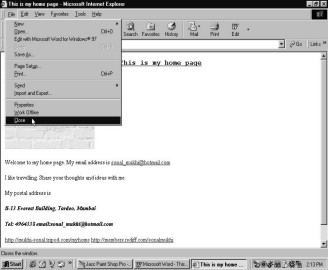
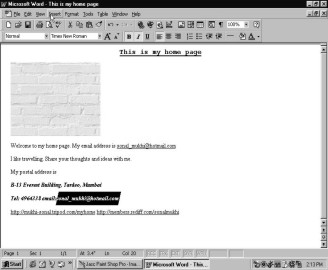
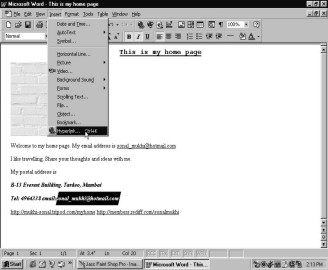
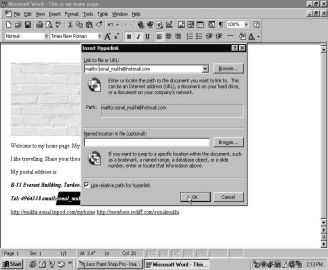
Remember how each time the arrow pointer changed to a hand on a website, it was your signal that you could take a lift to another site? Well, how about creating a hyperlink on your homepage too, so that the visitors have something productive to do while they are holidaying on your site? Even though productive here means, inserting one millionth of an ounce of pressure from your forefinger to the left derriere of your pet mouse!! Select your email identity and from the Insert menu, click on the option `Hyperlink`. A new `Insert Hyperlink` box will open which already has your email address typed in the `Link to file or URL` bar. Say `OK` and save this change.
|
|
|
||
|
Screen 7. 121 |
Screen 7. 122 |
||
|
|
|
|
||
|
Screen 7. 123 |
Screen 7. 124 |
|
||

A glance at your site page through the `Web Page Preview` apparel will confirm the new addition you just made on your homepage. Move the pointer over your email address and bingo, it changes to a hand!
|
|
|
|
Screen 7. 125 |
Screen 7. 126 |
Visit your Tripod homepage by logging in with your secret password. Drop in to say a quick hello to your file manager.
|
|
|
||
|
Screen 7. 127 |
Screen 7. 128 |
||
|
|
|
|
||
|
Screen 7. 129 |
Screen 7. 130 |
|
||
|
|
|
|
||
|
Screen 7. 131 |
Screen 7. 132 |
|
||

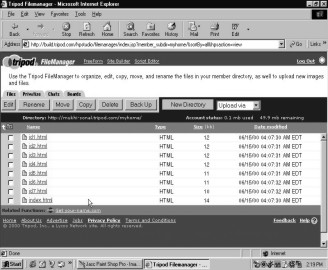
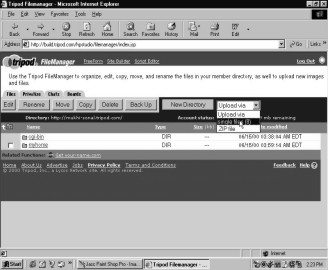
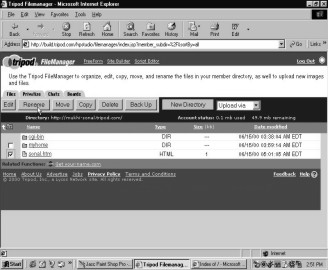
Click on your 'myhome' directory. This will list out all the existing files stacked in the directory. To upload your newly created Word file on to this site, click on the dropdown `Upload via` and select the `Single Files` option.
|
|
|
|
Screen 7. 133 |
Screen 7. 134 |
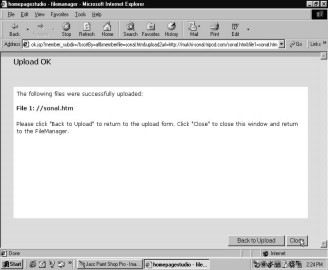
Follow the procedure of browsing through the `C` directory and selecting the sonal.html file. Click on the `Upload` button to install this on your site. Tripod very efficiently uploads this file on to your homepage and gives you the success message. Take a quick glance in your file manager’s cabin and you will see this new file resting on the bottom most shelf.
|
|
|
||
|
Screen 7. 135 |
Screen 7. 136 |
||
|
|
|
|
||
|
Screen 7. 137 |
Screen 7. 138 |
|
||
|
|
|
|
||
|
Screen 7. 139 |
Screen 7. 140 |
|
||
|
|
|
|
||
|
Screen 7. 141 |
Screen 7. 142 |
|
||


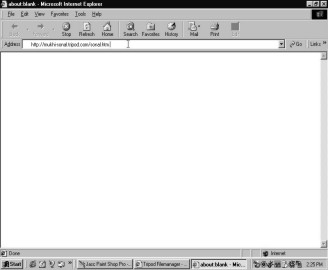
Launch on to your Internet browser by clicking on the `e` symbol of Internet Explorer. Type in your URL with the tag of sonal.html attached to it.
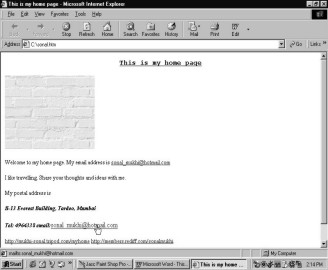
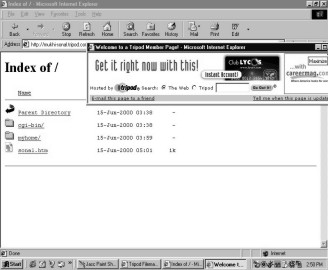
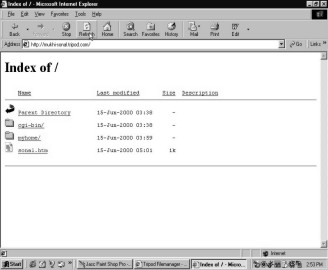
The site page that you created on Word will now appear before you. Notice that the image you had selected did not reveal itself. Moreover if you simply type in http://mukhi-sonal.tripod.com your homepage will not be displayed as before. Instead an ugly `Index of` page gets displayed. This page contains the names of all your directories and sub-directories.
|
|
|
||
|
Screen 7. 143 |
Screen 7. 144 |
||
|
|
|
|
||
|
Screen 7. 145 |
Screen 7. 146 |
|
||

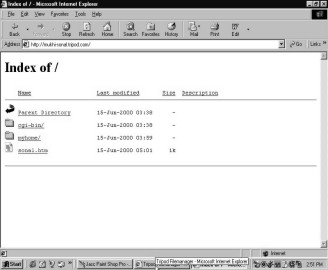
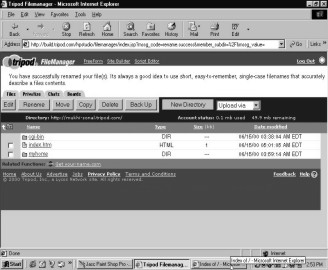
Let us first take care of the `Index of` page. Return to your file cabinet. Tick the small box next to the file named sonal.htm. Hit the `Rename` button and change this file name to index.htm.
|
|
|
|
Screen 7. 147 |
Screen 7. 148 |

Your file cabinet will once again show you a list of the files stored and this time instead of a sonal.htm you will see an index.htm nestling there.
|
|
|
|
Screen 7. 149 |
Screen 7. 150 |

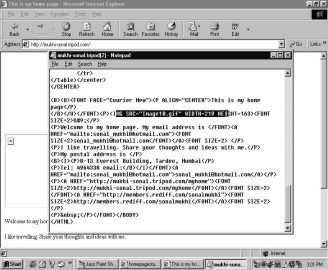
A click on the `Refresh` button on the `Index of` page will now display your homepage! I’m sure that you are wondering if David Copperfield has accidently left behind his magic wand or then probably himself in one of the memory locations in your computer from where pages, that earlier refused to be exposed, are now magically conjured up and exhibited before you.
|
|
|
|
Screen 7. 151 |
Screen 7. 152 |
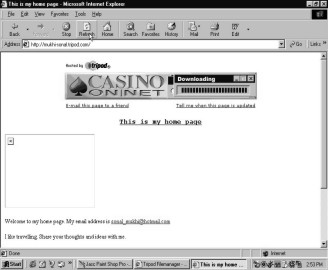
Unfortunately he and his magic wand are to busy doing shows around the world to remain static in your computer. But the magical word that is causing homepages to appear is index.htm. If you want your URL to end at http://mukhi-sonal.tripod.com instead of saying http://mukhi-sonal.tripod.com/sonal.htm then you need to rename your sonal.htm file as either index.htm or index.html. This is because when there is no file name specified after tripod.com then the server automatically searches for a file christened as index.htm or index.html and displays that as the first page. Some servers search for a file called default.htm or default.html. Incase you don’t have a file by either of these four names and you stop your URL address at http://mukhi-sonal.tripod.com, then the server will display the not so pretty `Index of` page. But we yet have a problem. Our image is still in a state of refusal to show up. No matter how many times you click on the `Refresh` button, it stubbornly remains hidden. But that yet isn’t an excuse to call David Copperfield!
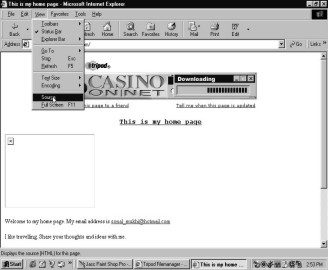
Instead let’s perform some magic ourselves! Go to the View menu and click on `Source`. The entire translation of your webpage in HTML will appear. Scan the coplicated code for the word img which stands for 'image'.
|
|
|
||
|
Screen 7. 153 |
Screen 7. 154 |
||
|
|
|
|
||
|
Screen 7. 155 |
Screen 7. 156 |
|
||

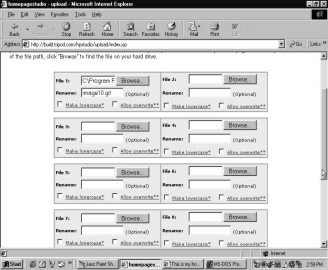
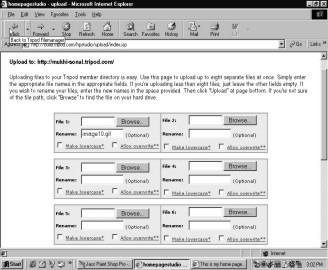
Once you locate Image10.gif, close this window and return to your file cabinet. Get ready now to upload a single file.
|
|
|
|
Screen 7. 157 |
Screen 7. 158 |
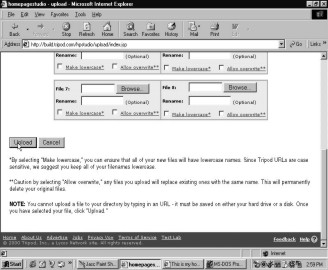
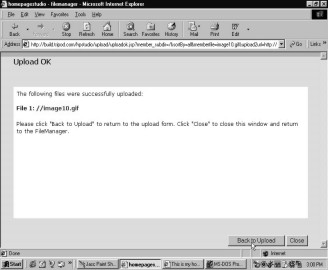
Now, similar to what you have done a million times over, click on the `Browse` button, select the name of your picture file and hit `Open`. The name of your picture file will appear in the space besides the Browse button. As in the HTML translation this file was called image10.gif rename your brick wall.gif file as image10.gif. Click on the `Upload` switch to force the image to now come out of its shell and say “bonjour”.
|
|
|
||
|
Screen 7. 159 |
Screen 7. 160 |
||
|
|
|
|
||
|
Screen 7. 161 |
Screen 7. 162 |
|
||

Once again when you return to your homepage, you expect your picture file to be ready and waiting to exchange greetings with you. But they did not write a book 'Great Expectations' for nothing!! Your picture yet remains safely hidden behind its protective mask.
|
|
|
|
Screen 7. 163 |
Screen 7. 164 |
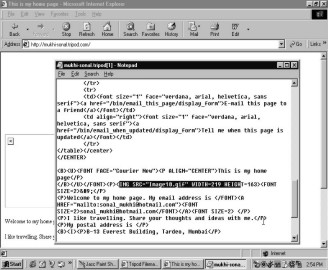
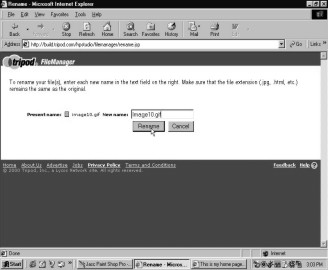
Return to `View-Source` to see where you went wrong. Aha! The name of the picture file mentioned in HTML is Image10.gif, whereas you have simply named it as image10.gif. File names are case sensitive. You need to put a capital letter where there is one, else the picture will not appear.
Return to the file cabinet and rename your image10.gif file as Image10.gif.
|
|
|
||
|
Screen 7. 165 |
Screen 7. 166 |
||
|
|
|
|
||
|
Screen 7. 167 |
Screen 7. 168 |
|
||

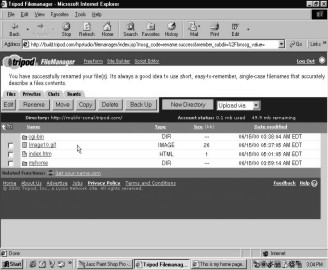
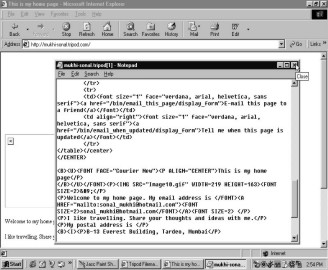
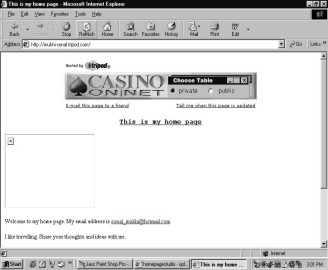
Now if you click on the `Refresh` button on your homepage, your picture has no choice but to loom up before you!! Magic, ain’t it?!
|
|
|
|
Screen 7. 169 |
Screen 7. 170 |
Internet Options
Have you ever noticed that each time you log on to the Internet, you are greeted by the MSN website? Well, this is the default setting and you are free to change it. If you wish that as soon as you launch on to the net, your homepage should be displayed before you, then your wish is my command.
|
|
|
|
Screen 7. 171 |
Screen 7. 172 |
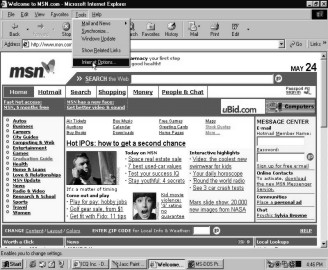
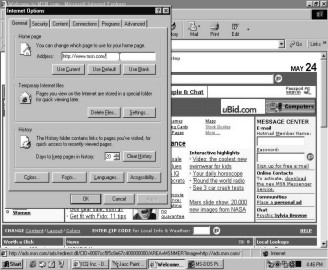
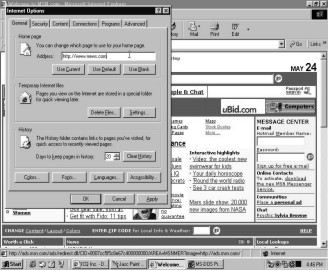
Go to the Tools menu at the top of your window. Select the `Internet Options`. You will see that in the blank space provided for the page to be used as the homepage is the address http://www.msn.com.
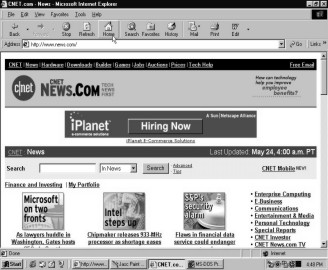
Change this address to http://www.news.com and press `OK`. A mere click on the `Home` icon will unfurl the www.news.com website before you.
|
|
|
|
Screen 7. 173 |
Screen 7. 174 |
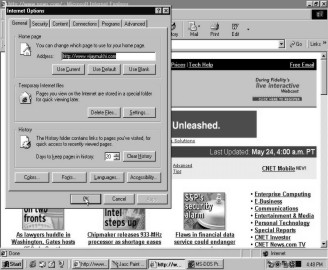
Once again, select the `Internet Options` from your Tools menu. Change the address to http://www.vijaymukhi.com. Like before `OK` this alteration and a click on the `Home` icon will display this new site for you.
|
|
|
|
Screen 7. 175 |
Screen 7. 176 |

So you can change the page that welcomes you just by altering a few settings in your Internet Options. Thus if you want the homepage that you have created to greet you as you launch on to the Internet, simply input that URL in your Settings option.
Ride On
Some more sites to grab free web space