![]()
CHAPTER TWO
Electronic Mail
Nothing better than
receiving news from friends and family around the world. People who you meet once
in a few years, people who you may never see again, people who matter so much
to you despite the distance. Wouldn’t you want to keep in touch with your
childhood friend who has migrated to Canada, your favourite uncle who is
working in Dubai or then the tall handsome Italian you met during your trip to
Europe? Well, the Internet allows you to do all this and much more. Gone are
the days when you had to take time off to write letters, buy stamps, walk three
blocks down to the post office to mail them. And yet there would be a seventy
percent chance that your letter might not reach your cousin studying in the
outskirts of Copenhagen. That is of course if you actually managed to beat the
laziness and make your way down to the post office!! The Internet offers you a
cheaper, faster and laziness-free option. Just log on to the net and dash off
an email or two to your aunt in Nairobi, your brother in Chicago or then your
boyfriend in France. No need to depend on the inefficient postal system. But
the first thing that you need to do is open an email account that enables you
to send and receive messages from around the world.
Let us first open an email account that can be accessed through Microsoft Outlook Express. Click on the mail icon above the address bar. From the options available select `Read Mail`.
|
|
|
|
Screen 2. 1 |
Screen 2. 2 |


The dialog box that appears asks you to type in your name. The name that you type in will be the one that will appear with all the emails you send. Here we are inputting `Vijay Mukhi`. But make sure that you enter your own name in this address bar. After entering your name, click on the `Next` button to move to the subsequent box.
|
|
|
|
Screen 2. 3 |
Screen 2. 4 |


This box asks you enter the email address that you would like to use. When you take an account with an ISP you are provided with an email identity. You need to enter that email address in this blank bar. Incase you don’t already have an email address, select the second option where you can sign up for a new account.
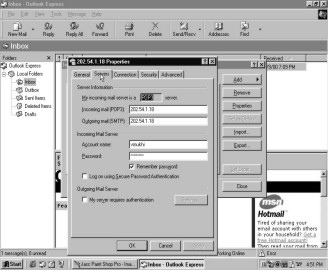
The next dialog box gets a bit technical. You need to input the name of your incoming server. An incoming server is similar to a letter box. It is a machine that stores all your mails. POP stands for Post Office Protocol. Simple Mail Transfer Protocol is the full form of SMTP. It is the outgoing server which functions like a post box that accumulates all the messages that you want to send. You also need to feed in outgoing mail server numbers. This name/numbers are given to you by your ISPs.
|
|
|
|
Screen 2. 5 |
Screen 2. 6 |
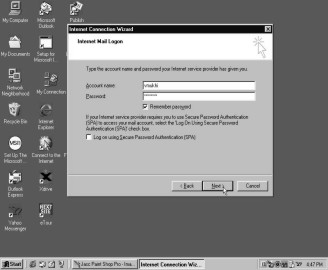

In the following box enter your email account name and password. This is again given to you by your ISP. Your password will be displayed as a row of asterisk on the computer screen. The password is a security that prevents others from reading your mails. Make sure you don’t disclose it to nobody. Not for a bar of chocolate, not for free tickets to 'American Beauty', not even for a trip to the moon. The provision for entering your password is optional.Similarly, if you tick the `Remember password` option, you will not be asked to supply your password the next time you wish to access your mails.
|
|
|
|
Screen 2. 7 |
Screen 2. 8 |
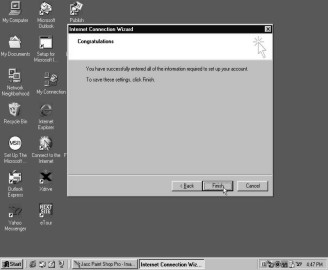
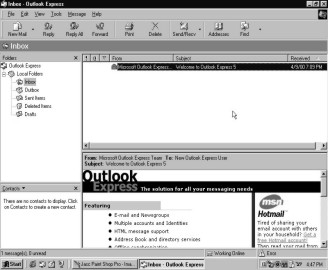
You have succeeded in supplying all the information required to set up the account. Click on the `Finish` button to save all the data you have inputted. Go to the inbox to see if you have received any mail. The first mail you receive is from the Microsoft Outlook Express welcoming you to their email services. Each mail you receive or send will have the label `To` and `From` attached to it. This way you know who is mailing you. The inbox also displays the date and time of the mail that was sent to you.
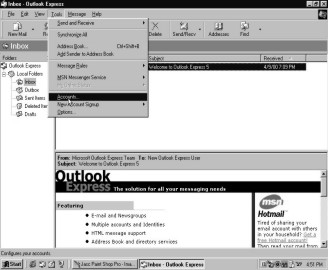
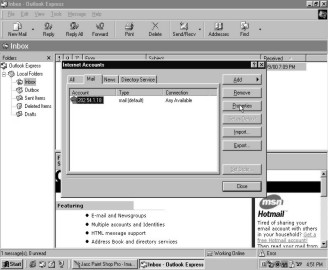
To view your account details, go to the Tools menu and click on `Accounts`. Select `Properties` to verify the correctness of the data you had entered while creating your account.
|
|
|
|
Screen 2. 9 |
Screen 2. 10 |
|
|
|
Screen 2. 11 |
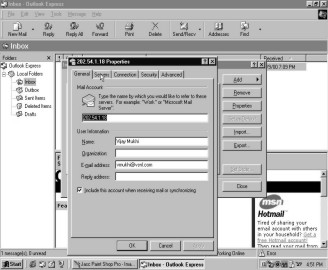
This box will display all that you have fed into the computer whilst you made your account. If you change the name in the `Name` column then the email will be sent under that new name. Want to startle your girlfriend? Or get back at an old foe? Then this is how you do it. Change the name in the `Name` bar to Tom Cruise and type in romantic sweet nothings. Jot down poems, ballads, songs on love and adoration. Even beat Shakespeare when you talk about the depth of love you have for her. And take my word for it, the look on your girlfriend’s face when she receives the mail under the name of the Cocktail hero will be priceless. So you see it ain’t so 'mission impossible' to fool your babe!
To set the score even between you and the guy next door, just mail him a fictitious lunch appointment under the name of his boss and watch him drink gallons and gallons of water while waiting for big boss to show up! Only you know how endless that wait can be! But this teaches you the very first lesson about emails. You can never trust them, coz two can play the game. Today you fooled your girlfriend, well tomorrow she may do the same. So there is always the possibility of retaliating on the net.
To confirm the name and number of your server click on the `Server` option. You are free to make changes if you so desire. The account name and password are only required to read your mail. The POP and SMTP numbers are provided by your ISP. Close the `Internet Accounts` dialog box and from the File menu select `Exit`. Once again click on the `Read Mail` option.
|
|
|
|
Screen 2. 12 |
Screen 2. 13 |

|
|
|
|
Screen 2. 14 |
Screen 2. 15 |


To send or receive mails you can click on the `Send/Recv` icon. Since you don’t have any new mails in your inbox let us exit from this account and navigate further into the world of emails.
|
|
|
Screen 2. 16 |

Let us make an account in Hotmail. No, that does not necessarily mean that your mails will be sizzling hot with gossip and scandals. But the name may have something to do with the 'Hot Male', Sabeer Bhatia, who is the creative brain behind this ingenious service. Well, the biggest advantage of having an account with Hotmail or Yahoo! is that you can access it anywhere in the world. Even if you are atop the highest mountain peak in the Tundra region or swimming underwater with the penguins in Antarctica, you can still read your mails, so long as you are able to lay your hands on a computer with an Internet connection! This is because Yahoo! and Hotmail provide web based email services. This is not the same for a VSNL, MTNL or any other ISP account which may or may not be accessible from all places on the globe. Make sure that you are connected to the Internet and then type in www.hotmail.com in the address bar and press `Enter`.
|
|
|
|
Screen 2. 17 |
Screen 2. 18 |
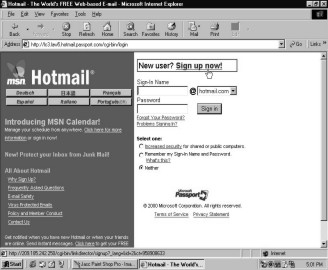

When you reach the Hotmail site click on the `Sign up now` link to make yourself an account. Like any other registration form, Hotmail requests you to enter your details to allow them to provide you an account. Under Profile Information, input your name, surname, country, gender, birthday and occupation in the space provided.
You will notice that once you select your country, the options for `State` and `Time Zone` will automatically change. Like in Microsoft Outlook, the name that you submit here will accompany all your outgoing email messages.
|
|
|
|
Screen 2. 19 |
Screen 2. 20 |
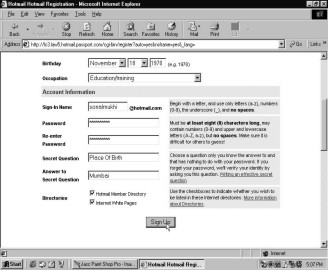
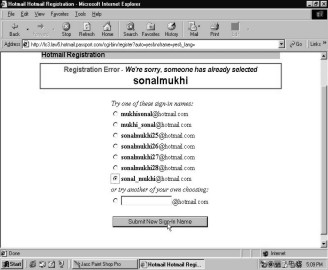
Account Information relates to your log-in name and your secret password. The name that you enter in `Sign-in Name` will be the first part of your email address. Type and retype your secret password. The secret question and answer will bail you out in case you forget your password. If you want to be a part of the Hotmail Directories, tick the check boxes at the bottom of the page. When you have supplied all the required information, click on the `Sign Up` button and wait for Hotmail to respond. The early bird catches the worm. If somebody else has already taken the log-in name you asked for, then you will have to select another. There may be one hundred Hetal Shah’s or Rohit Patel’s in this world. Judging by the ever increasing population around the globe, even a hundred mark figure may be an under-estimation! But for Hotmail, no two people can have the same sign-in name. So it presents you with a list of relatively similar options according to the one you had asked for. The options may have either some digit or underscore character attached to them. You can choose any of the suggested options or then you can type in one of your own. Click on the `Submit New Sign-in Name` button.
Hotmail congratulates you on the success of your account with their services. Your new sign-in name is sonal_mukhi@hotmail.com. You can send and receive mails on this address. To continue at Hotmail, click on the button provided.
Hotmail will then present you with a long page of terms of service. Like how everything mom says comes in from one ear and goes out just as quickly from the other, similarly this form needs to be blindly accepted. More than a three second glance at this page will be a waste of time.
|
|
|
|
Screen 2. 21 |
Screen 2. 22 |


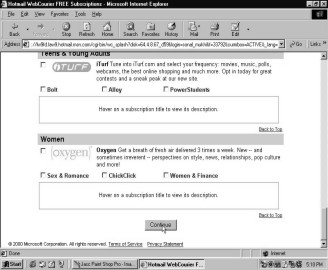
Hotmail offers you free subscriptions on various topics. You can select any subject that interests you and receive free web couriers on it. It is important to know that every email service provides you with only a ceratin amount of space. Hotmail allows you to 2000KB of free space. Incase your account size overshoots this limit, then the Hotmail staff will send you a warning message, threatening to erase your mails if you don’t get rid of them yourself! So be careful to delete all junk mails as soon as you receive them, before they burden your inbox. Thus if you don’t want your Hotmail inbox to be flooded with all these couriers ignore this service and click on the `Continue` button.
|
|
|
|
Screen 2. 23 |
Screen 2. 24 |

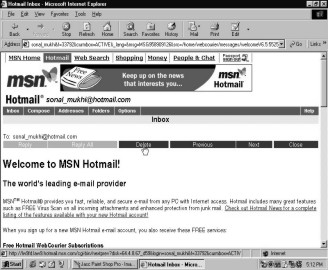
You will be then taken to your Internet letter box, which has one new mail. It is the Hotmail staff welcoming you to their email services. When the arrow changes to a hand, click on their name to read the message.
To delete the message click on the `Delete` button. After you delete a message, Hotmail moves to the next message or then takes you back to the inbox if there are no more new messages for you.
|
|
|
|
Screen 2. 25 |
Screen 2. 26 |

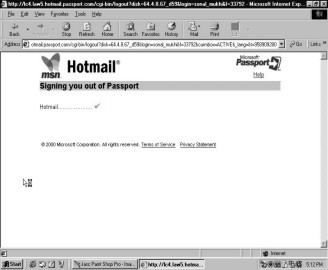
Once you have finished using your Hotmail account always sign out by clicking on the `Sign out` option. To ensure that you have successfully signed out from your Hotmail account, the signing out screen will be displayed.
|
|
|
|
Screen 2. 27 |
Screen 2. 28 |

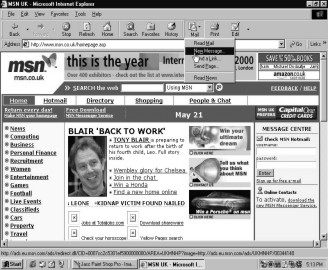
Let us send a message from your Microsoft Outlook account to your Hotmail account. Click on the mail icon and from that select the `New Message` option.
|
|
|
|
Screen 2. 29 |
Screen 2. 30 |
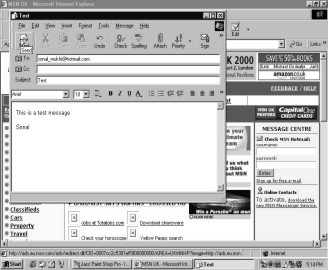
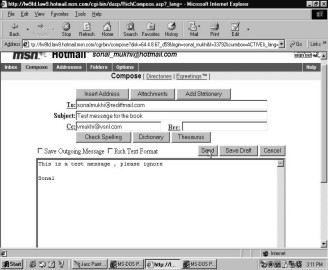
A new dialog box will appear. Type in your newly created Hotmail address in the `To` address bar. You can also give a subject to your message. As we are testing the functioning of our accounts, let us title the message as 'test'. Type in whatever message you want to send yourself. Maybe the recipe of what you feed your pet cat for dinner or your grandma’s medical prescription or then a simple line to say that this is a test message. After you have typed in the message click on the `Send` button. Your message will be flown across to your Hotmail account.
|
|
|
Screen 2. 31 |

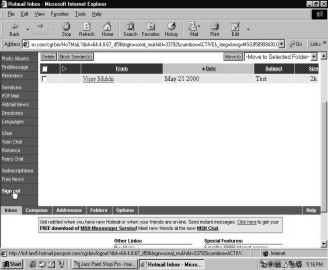
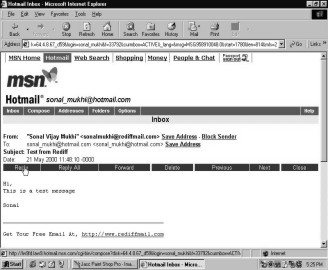
Punch in www.hotmail.com in the address bar to verify whether the message has been received. The Hotmail website looms up before you. Enter your log-in name and your secret password to access your account. Once you are sure that you have typed in the correct name and password click on the `Sign in` button. You are now ready to view your inbox.
And voila!! There is your message patiently waiting for you! So now you know why the postmen are the ones who are pouring over the classifieds more than any other unemployed MBA student! With the Internet threatening their present job status, they have no other option left, do they? I mean, who ever needs a khakhi clad man to deliver twenty-three day old letters at home, when you can just send and receive mails in the blink of an eye!! Click on your message to be able to read it.
|
|
|
|
Screen 2. 32 |
Screen 2. 33 |


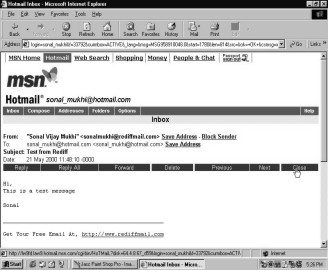
And lo and behold! The message has reached you just as you had typed it. No torn edges or bent corners like in the letters you get at home. Click on the `Close` button to be taken back to your inbox.
|
|
|
Screen 2. 34 |
Oops!! Aren’t you forgetting something? Does 'sign out' ring a bell for you? Well, click on the `Sign out` button to safely log out from your Hotmail account. You will either be taken to the MSN website or then transported back to the `Sign-in` page.
Lately some email services have added a new feature called `Vacation Replies`. Like an answering machine, this service will obediently send auto replies to those who mail you whilst you are on your holiday. So, if you don’t want to be disturbed while you tan on the Goan beaches, sipping beer, make sure you use this service!
How about going swadeshi? Let us make an account with one of the Indian sites. Type in www.rediff.com in the address bar.
|
|
|
|
Screen 2. 35 |
Screen 2. 36 |

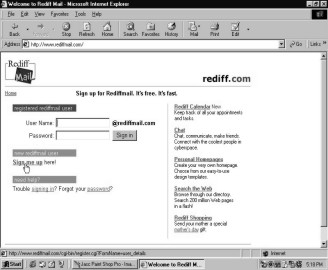
In this trendy website click on `Sign up` and then on the `Sign me up here!` button.
Similar to the Hotmail registration form, Rediff also asks you to supply them with information about yourself. The only difference between the two forms is that Hotmail obliged you to answer all their questions, whereas in this form you can omit responding to those questions that are not indicated with an asterisk. Once you have filled in the required details, click on the `Submit` button. Once again the hint question and answer will come to your rescue incase you forget your password.
|
|
|
|
Screen 2. 37 |
Screen 2. 38 |


The first message in your inbox is the welcome greeting from the Rediffmail staff.
|
|
|
|
Screen 2. 39 |
Screen 2. 40 |

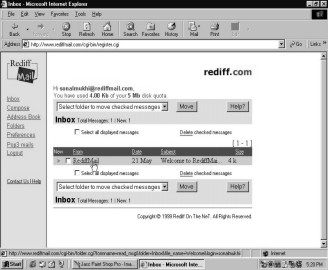
Click on the message to open it and then delete it just as quick!
|
|
|
|
Screen 2. 41 |
Screen 2. 42 |


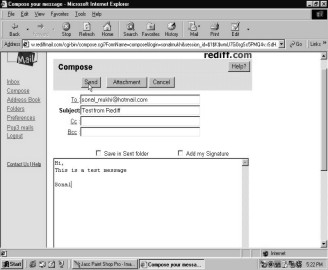
To send a message from your Rediff account select the `Compose` option on the left of the page. Type in the address of the person to whom you want to send the message. You may also give a subject to your message. In the white blank box that appears below, write out your message. To save the message you have typed you may tick the `Save in Sent folder` check box. Zip the message across to the addressee by clicking on the `Send` button.
|
|
|
|
Screen 2. 43 |
Screen 2. 44 |
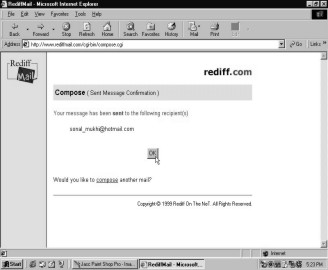
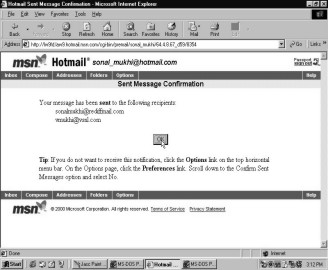
Rediff confirms that your message has been sent by giving you a `Sent Message Confirmation`. This way you can be rest assured that your message has been sent to the desired recipient. Click on the `OK` button and then successfully log out from this account.
To visit the Hotmail site, once again type in the site address in the address bar. Follow the same procedure as before to log on to your account.
|
|
|
|
Screen 2. 45 |
Screen 2. 46 |


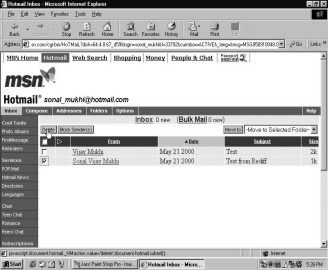
Your message from Rediff is waiting to be read in your inbox. Click on the message to view it.
|
|
|
|
Screen 2. 47 |
Screen 2. 48 |

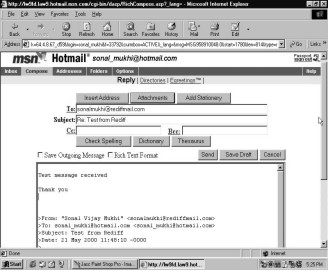
Let us reply to this message. Select the `Reply` option from the option bar. The Reply option saves you from the hassels of typing in the recipient’s address in the `To` column. The email address and the subject appear automatically in the respective data entry bars. The message box also has, attached to it, the original message that you have received. At the start of the box type in the message you want to send as a reply and click on the `Send` button.
|
|
|
|
Screen 2. 49 |
Screen 2. 50 |

To assure you that the message has been transported to the recipient, Hotmail provides you with a `Sent Message Confirmation`. Click on the `OK` button and you will be taken back to the message. Close this message and return to your inbox.
|
|
|
|
Screen 2. 51 |
Screen 2. 52 |

|
|
|
Screen 2. 53 |
Incase you do not want the message to lie in your inbox, tick the petit box next to the sender’s name and press the `Delete` button. Remember you don’t want to unnecessarily clog up your inbox. After all this is precious little space that you need to conserve incase you receive huge files loaded with pictures. So order your message to be sent to the trash can. And hey, don’t forget to sign out from your account!
ELECTRONIC
MAIL
Attachments
Well, I’m sure you are
convinced that operating through an email account is a much smarter decision
than waiting for days at your doorstep for the post man to bring you your
letters. Besides sending text messages you can also use your email account to
send pictures, photographs, forms and large documents that would probably weigh
a ton by the courier services.
Imagine filling and sending
a job application form for a Norwegian company in three minutes flat,
witnessing the Christmas party celebrations at your sister’s house in London,
kissing the photo of your newly born German cousin and seeing your friend’s latest blonde blue eyed
crush right here on your computer screen in Mumbai! Well, all this and much
more is possible through email accounts. All you need to know is how to send an
attachment.
Log on to your Rediff account and click on the `Compose` option to send an attached message.
|
|
|
|
Screen 2. 54 |
Screen 2. 55 |

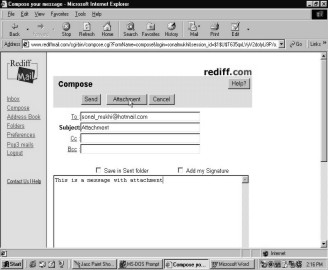
Enter the email address of the person to whom you want to send the message. Now, in the white blank box jot down a few words to accompany your attachment and click on the `Attachment` option.
|
|
|
|
Screen 2. 56 |
Screen 2. 57 |
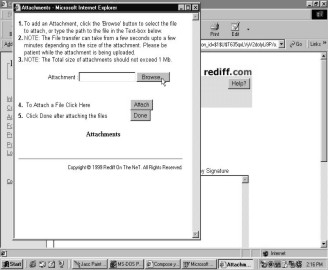

An `Attachments` dialog box appears. To adjoin the desired file, click on the `Browse` button. From the new box that appears you can select the file you want to attach. You may attach any file saved on your hard disk. It maybe a picture file with snapshots of your graduation day, a photograph of your pet cat’s pet mouse or then your milk man’s portfolio. It may also be a text file with your thesis on why 'mom’s are from Mars and dad’s are from Venus' or then some random jotting of your observations during a journey in the 10.37 Virar local. Click on the name of the file you want to attach and click on `Open`. The name of the file will appear in the `File name` column.
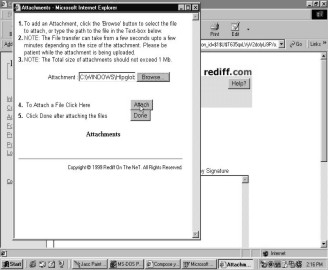
The space next to the Browse button will now contain the name and location of the file you want to attach. To give the green signal to adjoin the file to your message, click on the `Attach` button. The attachment process may take from a few quick seconds to some stretched long minutes. If it is not a bank holiday, then you may have to wait for just a second or two for the attachment to be completed. But if your file happens to be in the hands of a lazy and corrupt official, then you can be sure that the attachment will be taken care of only after he has drunk his seven cups of chai and had a bite of his staple vada pav diet. Else you can tempt him to speed up your work by showing him the money. Nothing makes him work faster than the rustling of some 'green leaves' in his pockets!
|
|
|
|
Screen 2. 58 |
Screen 2. 59 |
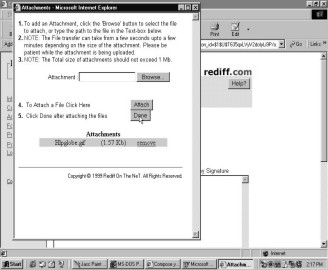
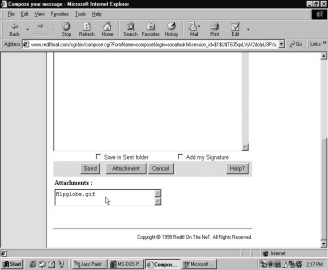
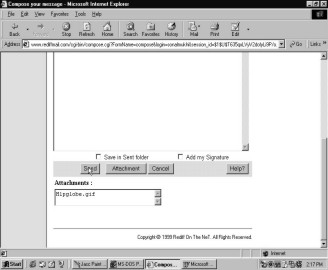
Once the attachment bar displays that the file has been successfully attached, click on the `Done` button. You will then return to the Compose message screen which will show the name of the file that is attached. Click on the `Send` button to dispatch your hipglobe.gif file.
|
|
|
|
Screen 2. 60 |
Screen 2. 61 |
Acknowledge the sent message confirmation by clicking on the `OK` button and log out from your Rediff account.
|
|
|
|
Screen 2. 62 |
Screen 2. 63 |

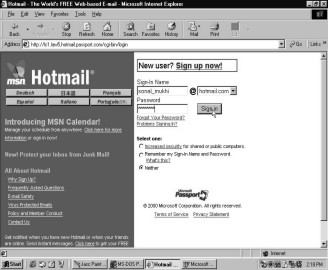
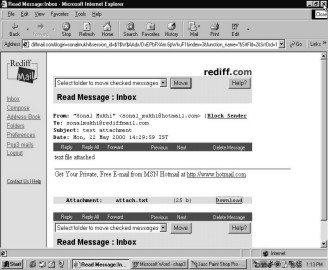
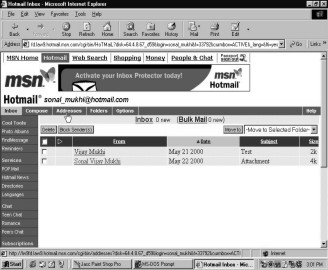
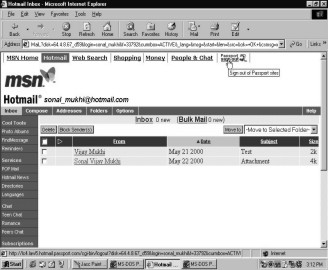
Log on to your Hotmail account and click on the latest message you have received. The inbox title bar always flashes the number of new messages you have received. The new messages will be indicated by a lopsided red triangle at the left of the sender’s name. This helps you to easily distinguish between the new and the old messages.
|
|
|
|
Screen 2. 64 |
Screen 2. 65 |

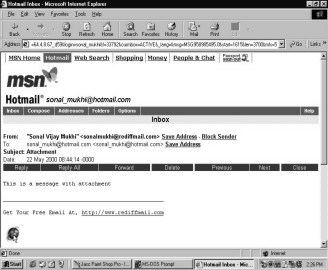
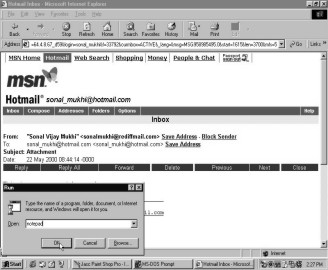
The message is displayed before you. The picture attached is represented by a round globe like icon under the message.
From the menu that appears select `Run`. Here you can enter the name of the program, file or folder you want Windows to open for you. Let us type a message in notepad and send it as an attachment.
|
|
|
|
Screen 2. 66 |
Screen 2. 67 |

In the notepad screen that appears before you, write out the message you want to attach.
|
|
|
|
Screen 2. 68 |
Screen 2. 69 |
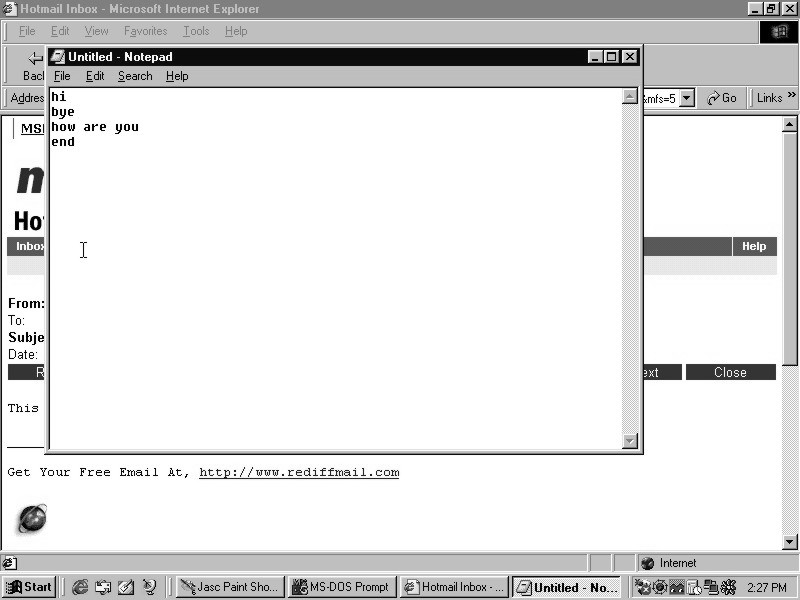

From the File menu select `Save As` to save the text you have just entered.
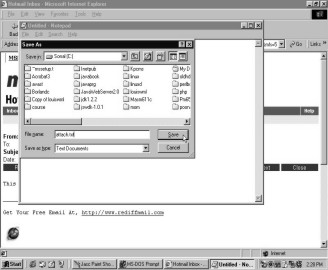
Let us save it in the `C` drive as attach.txt file. You may name the file what you wish. You may even call in a panditji to determine the debut alphabet of the file name. This way you can be sure that even the gods up above are pleased by the name that you have conferred on the file! Click on the `Save` button to save this file on your hard disk. To exit from the notepad, click on the `x` at the top right hand corner.
|
|
|
|
Screen 2. 70 |
Screen 2. 71 |

Once the notepad vanishes, the Hotmail screen hiding below, surfaces once again. Select `Compose` to send your newly created file as an attachment.
|
|
|
|
Screen 2. 72 |
Screen 2. 73 |


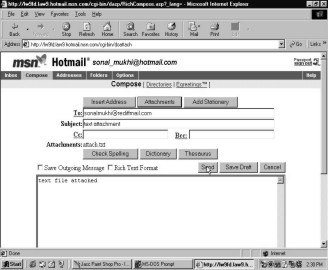
After entering the necessary email address, subject and accompanying message, click on the `Attachment` button.
Similar to the procedure you followed at Rediff, click on the `Browse` button to allow Hotmail to locate the file to be attached.
|
|
|
|
Screen 2. 74 |
Screen 2. 75 |


From the `C` drive select the attach.txt file you just created and click on the `Open` button. When you return to the Hotmail attachments screen, press the `Attach to Message` switch.
|
|
|
|
Screen 2. 76 |
Screen 2. 77 |

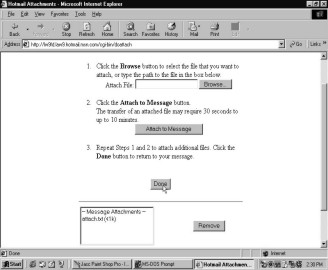
When the little white box at the bottom of the screen indicates that the file has been attached by displaying the name of the file, click on the `Done` button.
On your compose screen, you will see the words 'Attachments: attach.txt'. This is to ensure you that your file, attach.txt, has been tagged to your message. Click on the `Send` button to zip this file across to your Rediff account.
|
|
|
|
Screen 2. 78 |
Screen 2. 79 |
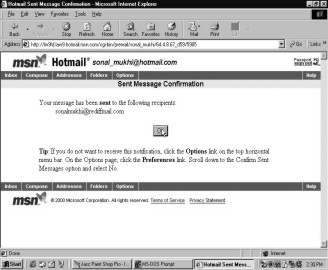
As usual, Hotmail plays it safe by letting you know that your message has been instantaneously delivered to the desired recipient. Press the `OK` button and then sign out from Hotmail.
|
|
|
|
Screen 2. 80 |
Screen 2. 81 |

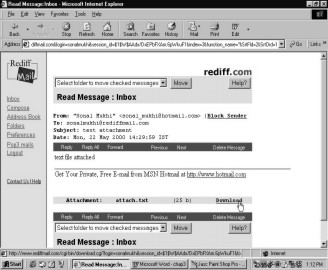
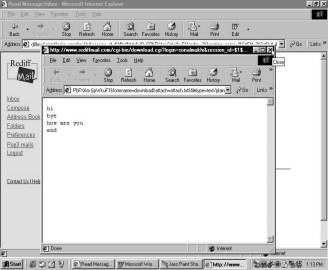
Visit Rediff to open the attached message that Hotmail has sent you. Click on the sender’s name and the message appears on your screen. To see the attached message, click on the `Download` option.
|
|
|
|
Screen 2. 82 |
Screen 2. 83 |

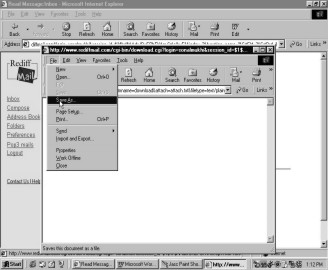
And there it is, the 'hi and bye' greetings you had sent yourself. To save this message, choose the `Save As` option from the File menu. By saving the message on your hard disk you can read it at ease whenever you please without having to connect to the Internet. So if mommy dearest is ticking you off at the moment for coming home an hour later than your deadline or the persistent phone won’t stop ringing unless you go answer it, then simply save the attachment for future read.
|
|
|
|
Screen 2. 84 |
Screen 2. 85 |

|
|
|
Screen 2. 86 |
Type in the new name you want to give this file and click on the `Save` button. Now you have two files with different names but containing the same greetings on your hard disk. This is only because here you are both the sender and the receiver of the message! Close the download box by pressing the `x`. You will then return to your Rediff inbox where the original message is displayed. Close it and log out from your email account.
ELECTRONIC
MAIL
Address Book
Like the little black phone
and address book you keep in your back pocket, you can create an email address
book on your email account. No need to remember whether your uncle’s email
address has an underscore between his name or whether it is
'rahulmehra@hotmail.com' or 'mehrarahul@hotmail.com'. The address option saves
you from trying out the different possible permutations and combinations until
you hit on the right one.
|
|
|
|
Screen 2. 87 |
Screen 2. 88 |

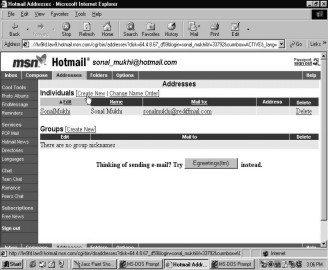
After you have logged on to your Hotmail account, click on the `Addresses` option. You can store either individual addresses or then group ones. To make an address book with individual email addresses click on the `Create New` option.
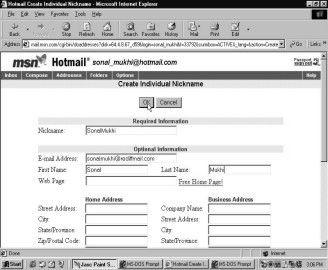
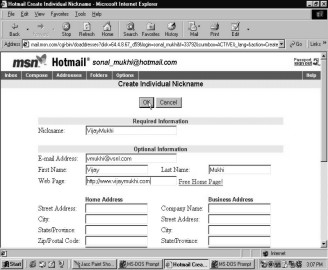
The `Create Individual Nickname` dialog box will open. Enter the nickname, the email address, the first and last name of your friend in the space provided. The nick name need not necessarily be the real name of the person. You can enter any small pet name like rinky, chinky, minu, sonu, etc. Once you have supplied the required information, click on the `OK` button.
|
|
|
|
Screen 2. 89 |
Screen 2. 90 |
|
|
|
|
Screen 2. 91 |
Screen 2. 92 |
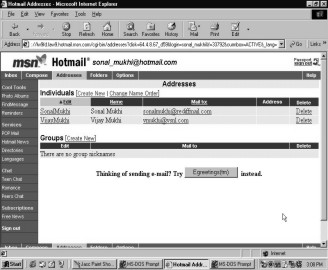
To enter another name, click on the `Create New` switch again. Once again enter the information asked for. Your individual address book will have two names stored in it. You are now free from the burden of remembering these email addresses.
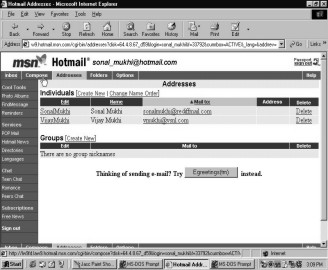
To send a mail to the people whose addresses you have saved in your book, click on the `Mail to` option. To write an email click on the `Compose` button.
|
|
|
|
Screen 2. 93 |
Screen 2. 94 |

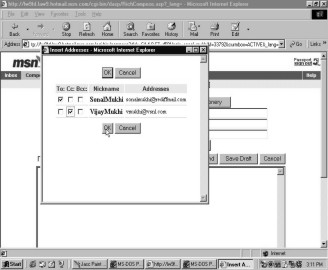
To input the email addresses of those who you want to mail, choose the `Insert Address` button. A dialog box containing the names and addresses of those you have stored will be displayed. If you want to send the message to both the people in the list, tick the check boxes next to their names.
|
|
|
|
Screen 2. 95 |
Screen 2. 96 |


Automatically the recipient’s address will be typed out in the `To` column. No need for you to unnecessarily memorize them. So you see, this address book feature of Hotmail allows you to conserve your gray cells for remembering other better things like the date of your next dental appointment, the day your dog gave birth to a litter of puppies or then trignometry formulae.
|
|
|
|
Screen 2. 97 |
Screen 2. 98 |


Incase you change your mind, which is by far man’s most characteristic feature, click on the `Insert` option button once again. Instead of mailing it directly to both persons you may `cc` it to the second person. CC stands for 'carbon copy'. The second person will receive a carbon copy of the message you send to the first person. `Bcc` is the abbreviated version of 'blank carbon copy'. If instead of 'cc'ing the message you 'bcc' it to the second person then the second person will not come to know that you have sent the same message to somebody else. So incase you are feeling lazy to retype the message, you may simply bcc your wife the same love letter you email your girlfriend! The computer understands man’s need to be secretive while being infidel!
|
|
|
|
Screen 2. 99 |
Screen 2. 100 |

The email addresses will appear in the slots you ticked for them. Type out the message you wish to dispatch and hit the `Send` button.
|
|
|
|
Screen 2. 101 |
Screen 2. 102 |
|
|
|
Screen 2. 103 |
Say `OK` to the sent message confirmation and sign out from your account.
So you will agree how simple it is to create your
own bank of addresses of your friends, family and colleagues. Most email
services provide you with this convenient, time saving and memory conserving
feature. I’m sure that you are smart enough to figure out how to build a
similar address book in your Rediff account. Simply click on the right options
and zip off mails by the dozen!![]()
Ride On
Some more free email accounts